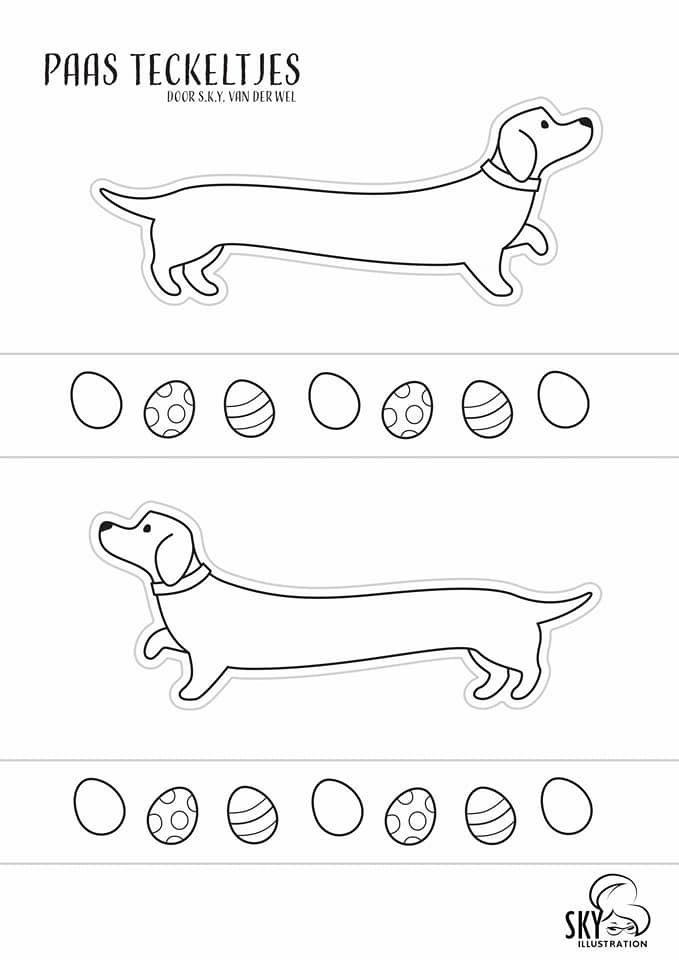
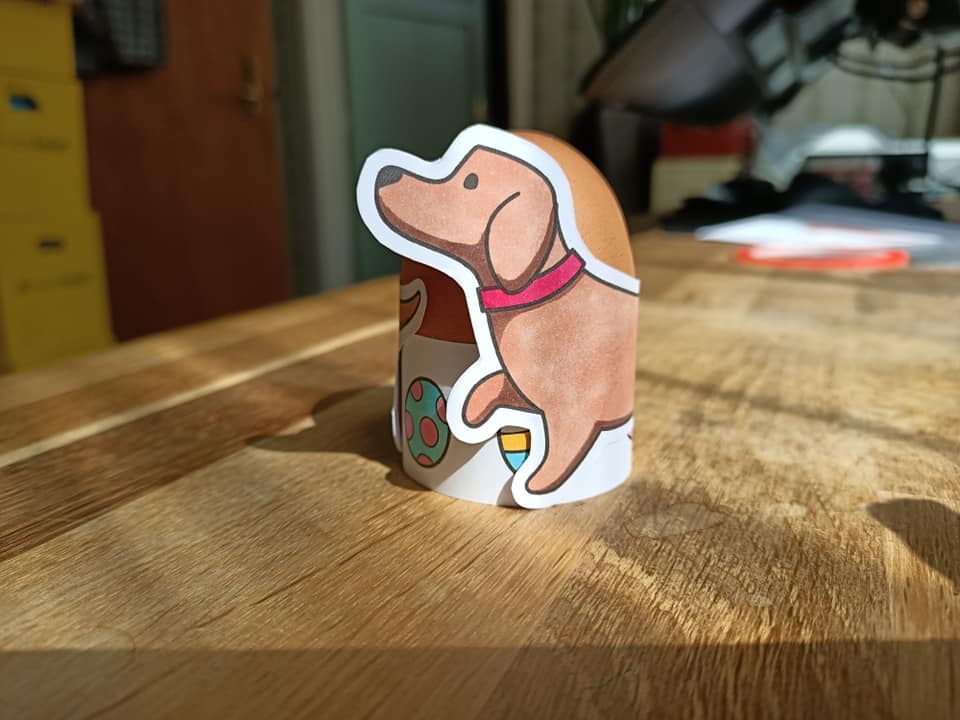
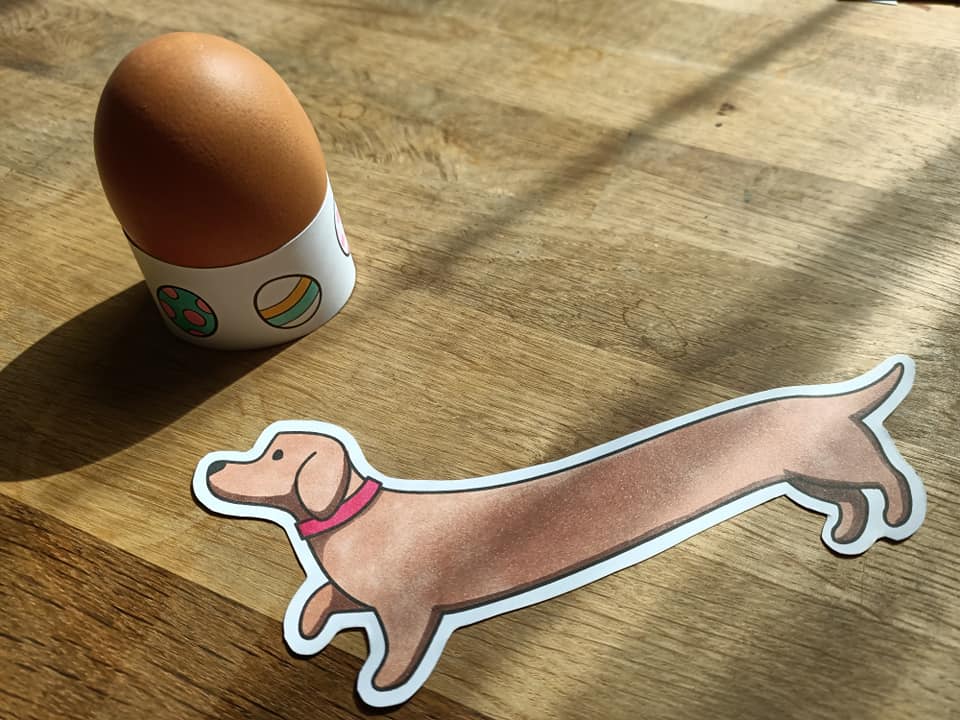
   Deze leuke Paas teckeltjes kun je zelf printen, kleuren en uitknippen. Leuk voor tijdens het Paasontbijt.
Teckel print en foto's zijn gemaakt door Sky van der Wel via facebook.com 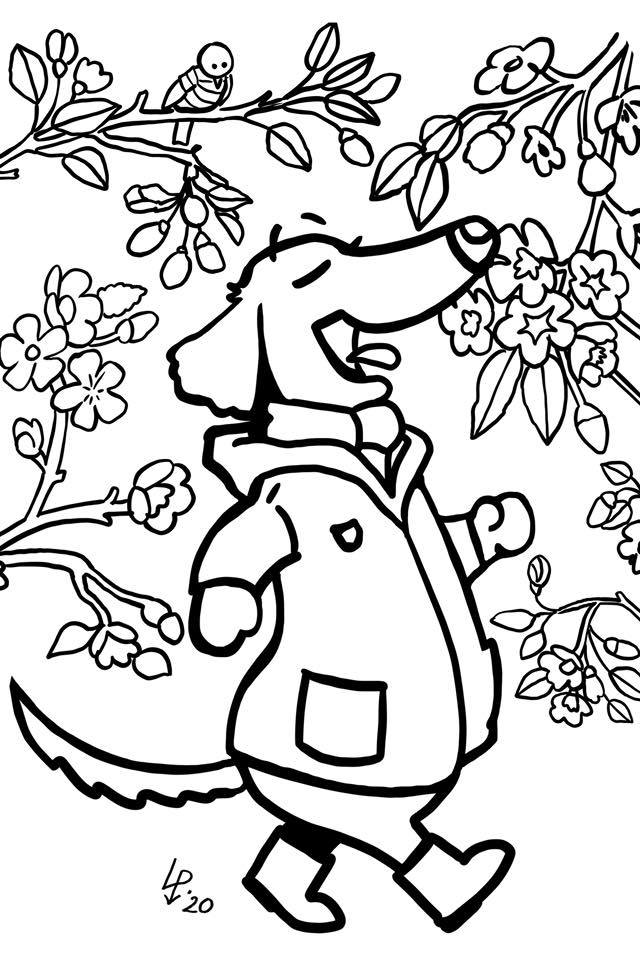 Een teckel kleurplaat gemaakt door Linda - The Coloured Leaf via facebook.com
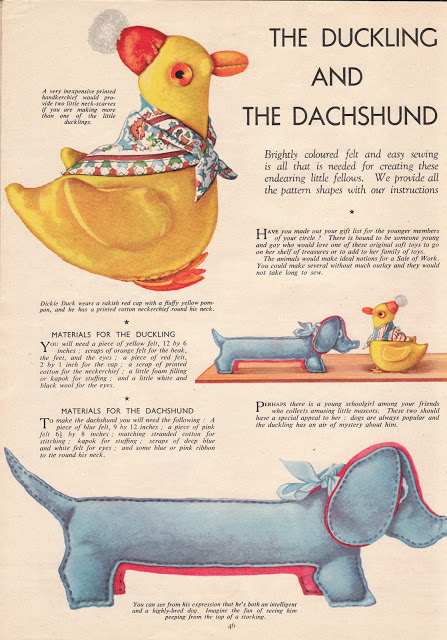
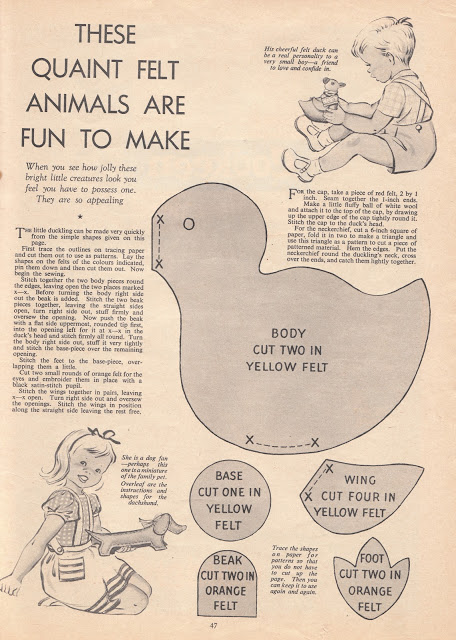
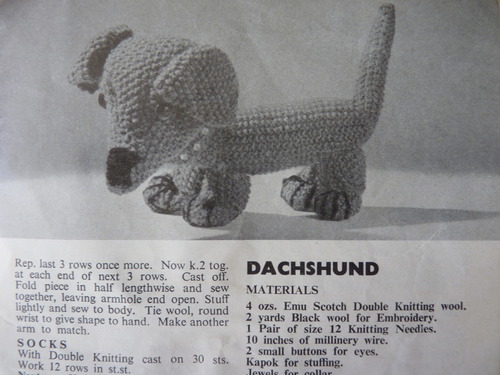 Please note: for my dachshund, I did not knit the collar, toes, or use the millinery wire to make the tail stand up. I stitched on a triangle of felt for the nose and embroidered the eyes.
Materials 50g DK wool 2.75mm knitting needles (UK 12 / US 2) Black thread for embroidery 10 inches of millinery wire Toy stuffing 2 small buttons for eyes Jewels for collar Knit in moss stitch throughout. The body Begin at tail end and cast on 6 sts. Work 1 row. Next row: Work 1. *Work twice into next stitch. Repeat from *to last stitch, work 1. Next row: Pattern. Repeat last two rows once. Next row: Work 1. *Work twice into next stitch. Repeat from *to last 2 stitches, work 2. Work 49 rows on these 26 stitches. (Note: when I did this I ended up with 33 stitches not 26, so I had to do some reducing before knitting straight. Not sure if it’s just me misunderstanding the pattern.) Next row: Work 1, [k2 tog.] to last stitch, work 1. Cast off remaining stitches for neck edge. Chest gusset Cast on 4 stitches and work 1 row. Increase 1 stitch at each end of next row. Work 2 rows straight, then decrease 1 stitch at each end of the following row. Work 1 row. Cast off. The head Sides of head - knit two alike: Begin at top by casting on 14 stitches and work 8 rows. Next row: Cast on 2, work to end. Next row: Work to last stitch, increase 1. Next row: Cast on 7 stitches, work to end. Work 5 rows on these 24 stitches. Next row: Knit 2 together, work to end. Next row: Work to last 2 stitches, knit 2 together. Repeat these 2 rows 3x more. (16 stitches) Next row: Cast off 4, work to end. Work 2 rows. Next row: Knit 2 together, work to end. Work 4 rows. Cast off. Head gusset: Begin at top by cast on 3 stitches. Work 1 row. Next row: Pattern, increasing into first and last stitches. Work 5 rows straight. Repeat the last 6 rows 4x more. (13 stitches) Next row: Knit 2 together, work to last 2 stitches, knit 2 together. Work 3 rows. Repeat last 4 rows 4x more. Cast off. Collar: (Note: It might be nice to do this in a contrasting colour, if you have any odd scraps of wool.) Cast on 25 stitches and work 16 rows. Cast off. Ears (knit 2 alike): Cast on 4 stitches and work 1 row. Next row: Pattern increase into first and last stitches. Work 2 rows straight. Repeat last 3 rows 6x more (18 stitches). Decrease 1 stitch at each end of next 6 rows. Cast off. The legs (knit 4 alike): Cast on 23 stitches and work 3 rows. Next row: Work 10, knit 3 together, work 10. Next row: Work 9, knit 3 together, work 9. Work 2 rows straight. Increase 1 stitch at each end of next row. Work 2 rows straight. Cast off. The soles (knit 4 alike): Cast on 4 stitches and work 1 row. Next row: Pattern, increasing into first and last stitches. Work 5 rows straight. Next row: Decrease 1 stitch at each end of next row. Cast off. The toes (knit 8 alike): Cast on 4 stitches and work 1 row. Next row: Pattern, increasing into first and last stitches. Repeat last 2 rows 2x more. Work 3 rows straight. Cast off. The tail: Cast on 4 stitches and work 3 rows. Next row: Pattern, increasing into first and last stitches. Work 5 rows straight. Repeat last 6 rows 3x more. Work 12 rows straight, then decrease 1 stitch at each end of every row until 2 stitches remain. Knit 2 together and fasten off. Making up: Stuff and stitch all pieces together. If you are using the wire, insert it into tail, through body and into head after stuffing, then stitch together. Sew on the eyes and nose, claws on the toes, and glue / stich jewels onto the collar. 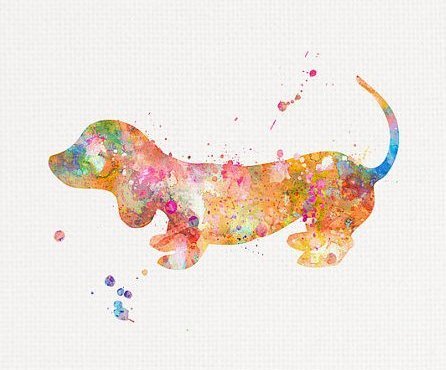 ...in vrolijke kleuren.
Volgens mij nog niet eens zo moeilijk om zelf te maken. Voor wie niet zelf wil knutselen: klik op de bovenstaande afbeelding voor herkomst.  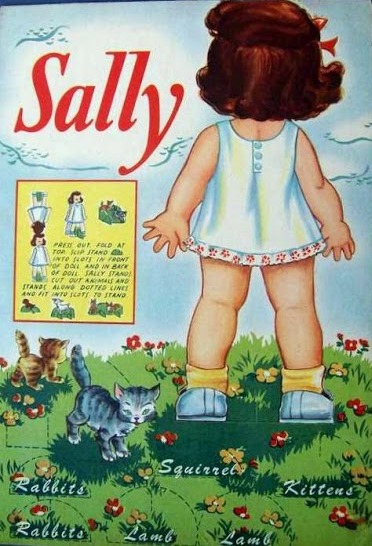  Sally the Standing Doll was een papieren aankleed pop voor kinderen.
Uitgegeven onder nummer 1042 door Lowe Publishing in de jaren '40 van de vorige eeuw. Grappig detail is natuurlijk het kleine vintage teckeltje. Meer afbeeldingen uit deze serie vindt u hier: free-paper-dolls.com 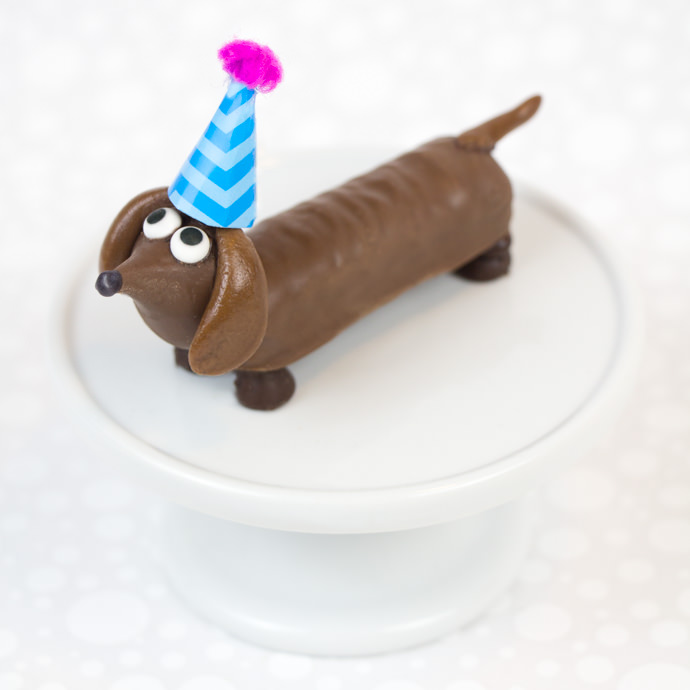 These candy canines are so doggone cute, I had a hard time giving them away! I surprised my daughter’s second grade class with a great big litter of these chocolate dogs on the last day of school. The kids just loved guessing all the different types of candies that were used to make them – Twix candy bars, Hershey’s Kisses, Tootsie Rolls and chocolate chips. 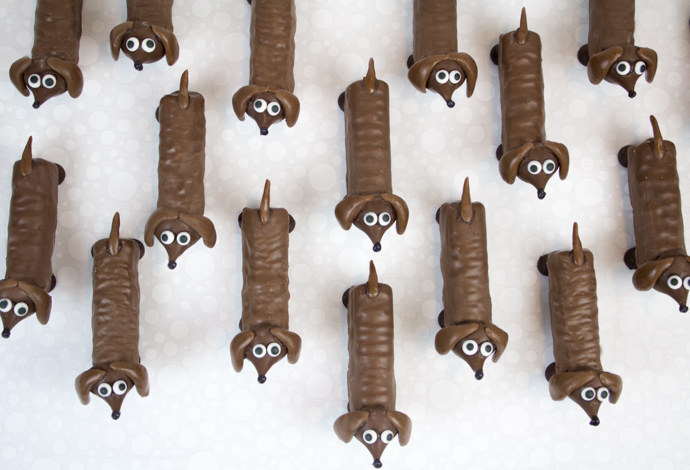 They might appear a little time consuming, but they’re not really. I found that an “assembly line” method worked best. Have all of your candy unwrapped and make your Tootsie Roll tails and ears before you are ready to attach everything with the candy melt. I love how their sweet puppy-dog eyes look up at you as if to say “Don’t eat me. I’m too cute.” Unfortunately, they are delicious. As if they weren’t adorable enough, I decided to add some tiny party hats to a few of them. They would come in Best-of-Show at any dog-themed party, for sure. 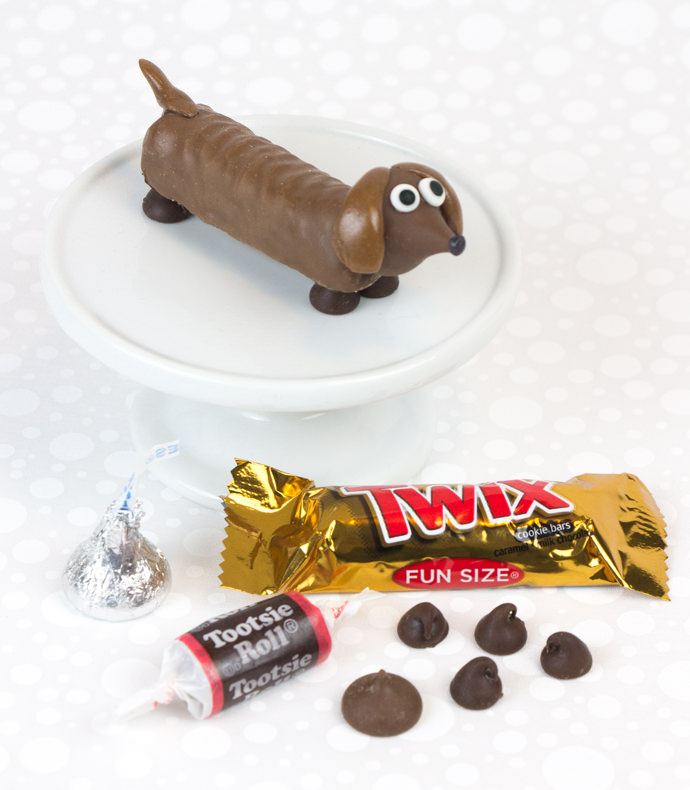 For this recipe, I used the smaller, fun size Twix bars. But now that I think about it, they would be pretty hilarious if you used the full size Twix bars, making extra-long wiener dogs! WHAT YOU NEED (Makes 12 chocolate dogs) Approximate time: 1 hour
HOW-TO 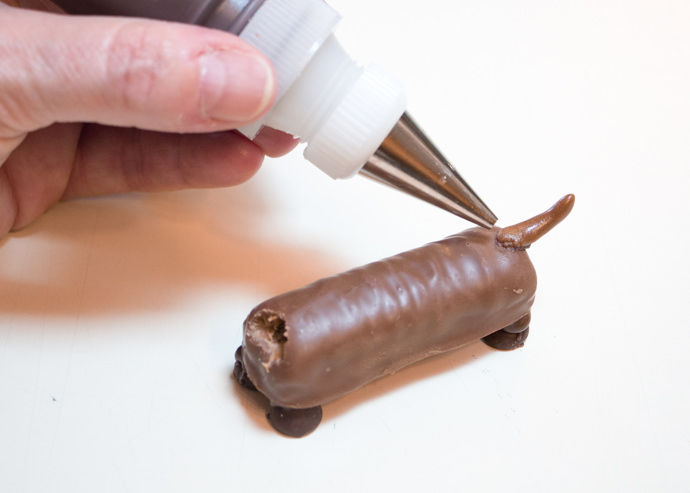 Step 1 To make the dog bodies, start by carving holes at the front of your Twix candy bars (this is where the heads will connect). Tear off tiny pieces of Tootsie Roll and roll to form the tails. Melt the chocolate candy melt wafers in a microwave for 30 seconds intervals, stirring until smooth. Pour into a small squeeze bottle. Attach the tails to the back ends of the Twix bars and attach the chocolate chips for the legs. Set aside, letting everything cool and harden. 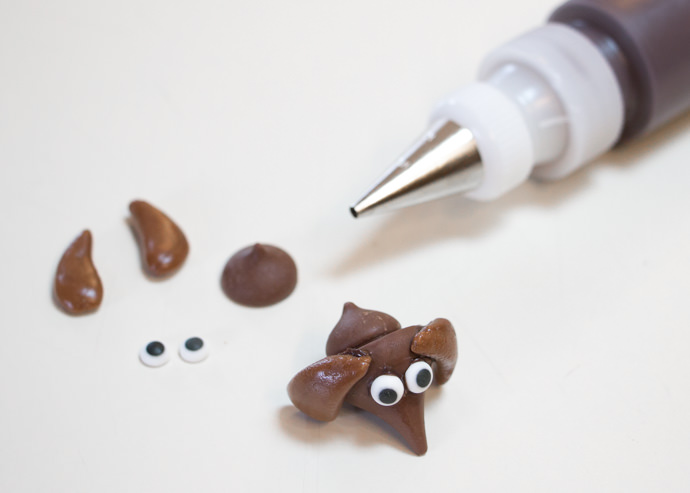 Step 2 To make the dog heads, start by forming the ears with small pieces of Tootsie Roll. Attach the ears to the sides of the Hershey's Kisses with dabs of candy melt. Attach the icing eyes with more candy melt. Then, attach the mini Hershey's Kisses to the backs of the heads with more candy melt (this will become the dog's neck). Allow the heads to cool and harden. 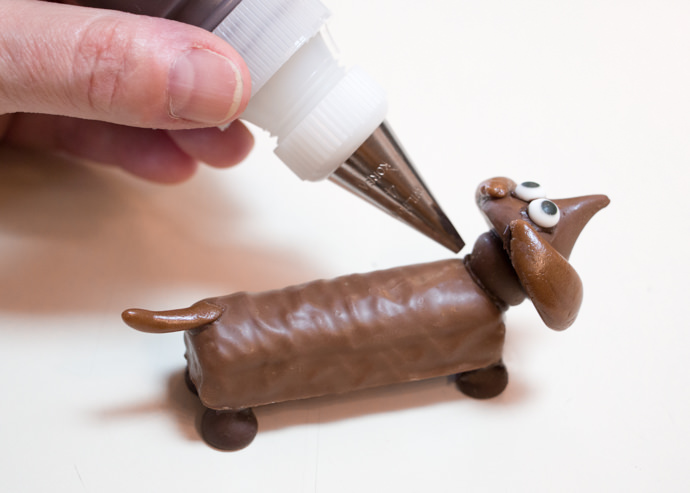 Step 3 To attach the heads to the bodies, squeeze candy melt into the carved holes on the fronts of the Twix bars. Insert the mini Hershey's Kisses into the holes and allow them to cool and harden. You may have to hold the heads in place for few seconds while they cool and harden. 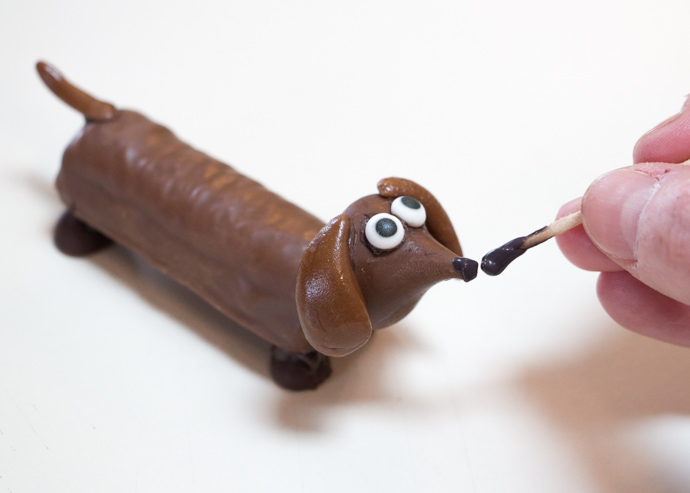 Step 4 Melt 3-4 black candy melt wafers in the microwave. Using a toothpick, dab the candy melt onto the tip of the Hershey's Kisses to make the dog's nose. 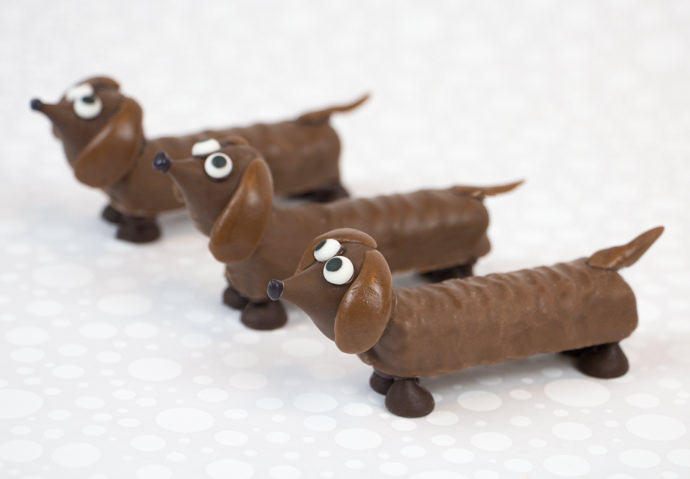 Step 5 If desired, add some paper party hats! 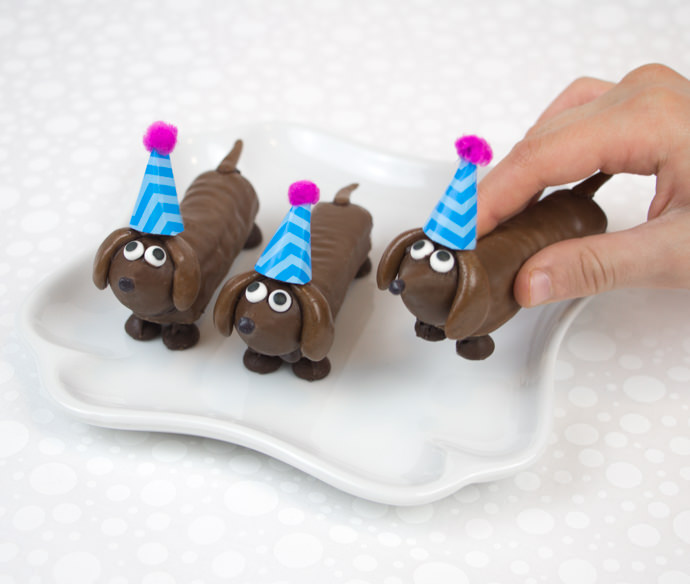 Chocolate dogs will keep at room temperature for 3-5 days or may be stored in the refrigerator for up to a month.
|
Hier blaffen wij
Wij zijn een uit Roemenië afkomstige schoonheid en een temperamentvolle Spaanse 
Categoriën
All
|


 RSS Feed